User Guide for Generate GPT Mail
Note: This guide provides instructions for setting up and using the Generate GPT Mail extension.
How to Setup
- First, click the link to download
the
generate-gpt-mail-extension.zipfile. Extract the .zip file to whichever location you prefer. The folder that you unzipped will need to live on your machine as long as you are using the extension. - Next, go to chrome://extensions/ in a new tab. The Extension Management page can also be opened by clicking on the Chrome menu, hovering over More Tools then selecting Extensions. When on the manage extensions page, enable 'Developer mode' by clicking the switch in the upper right corner.
- Finally, on the chrome://extensions/, click the button on the upper left to "Load
unpacked" and select the unzipped
generate-gpt-mail-extensionfolder to install it.
How to use
1. Manage Extensions
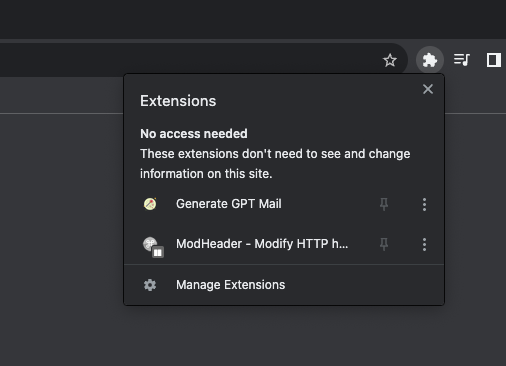
- Click the Extensions in your chrome, next to the URL form in the top right corner.
- Then click the
Generate GPT Mailicon.

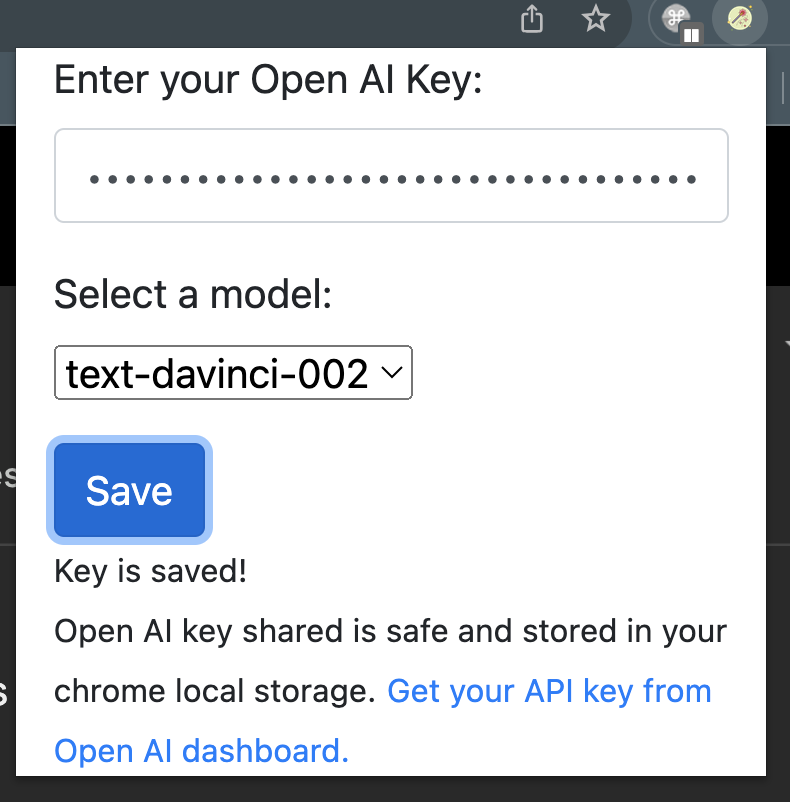
2. Save Open AI Key
- Get the Open AI API key from https://platform.openai.com/account/api-keys.
- Paste the key in the form.
- Choose the Open AI model from the dropdown.
- Click
Save

3. Generate Email
a. Compose an Email
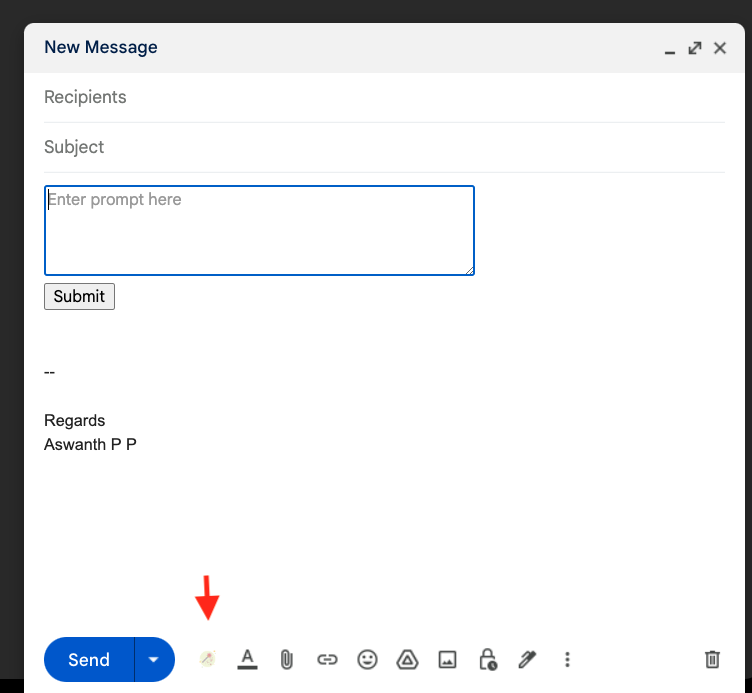
- Go to mail.google.com. Click
Compose. - Click the
Magic Wandin the Gmail compose window next toSendbutton.

Enter the prompt in the newly created form and click submit. eg:
Birthday wish for Alice!
The GPT Response will be added as a Mail content!!.
b. Reply to an Email
- Go to mail.google.com. Click
Replyto an Existing mail thread. - Click the
Magic Wandin the Gmail compose window next toSendbutton.
This will generate the reply email based on the mail conversation.